
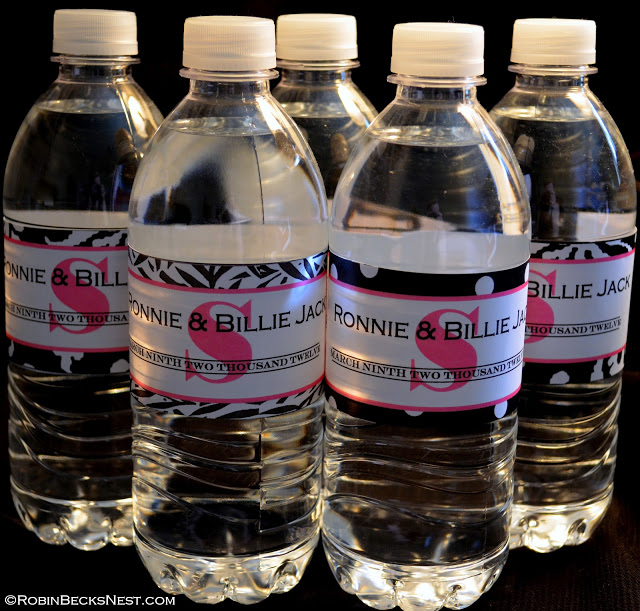
One of the things I made for my daughter’s wedding reception were personalized water bottle labels.
I’m going to show you some photos of them, then tell you how easy they are to make.
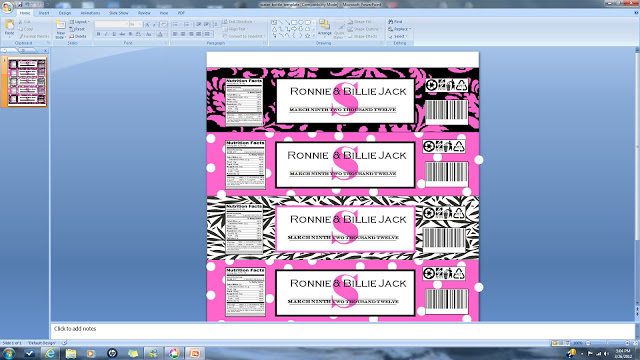
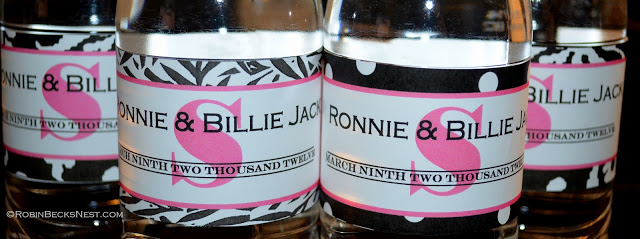 Close up view of bride and groom’s name with the S behind it in pink which is the first letter in his last name. Under that the date they were married.
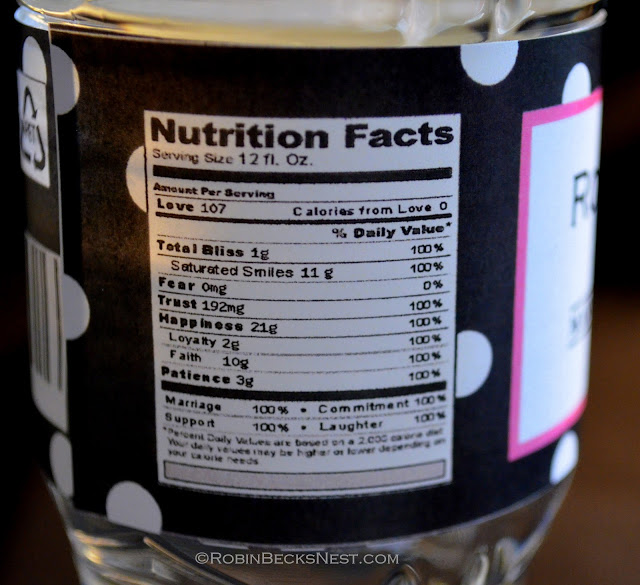
Nutrition Facts-Read closely, super adorable.
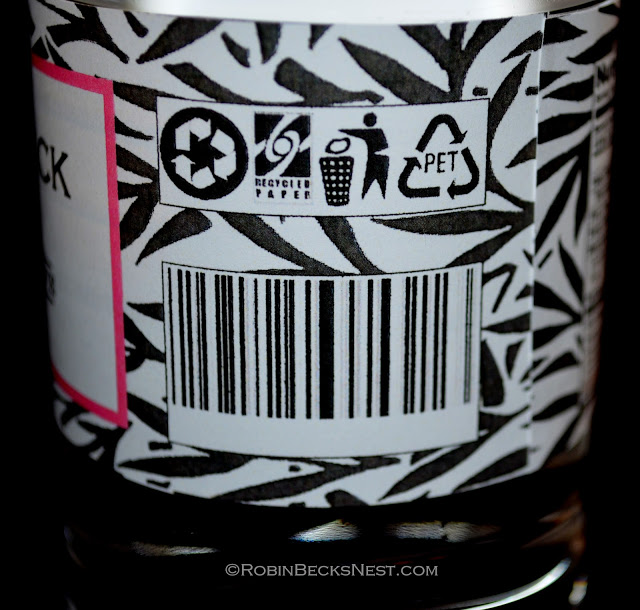
Complete with recycle information and bar code.
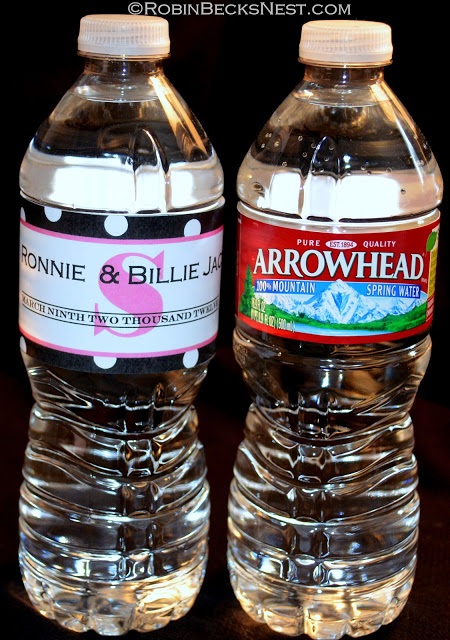
The labels pretty much fit any water bottle. We used Kirkland brand from Costco but as you can see here, they also fit Arrowhead bottles.
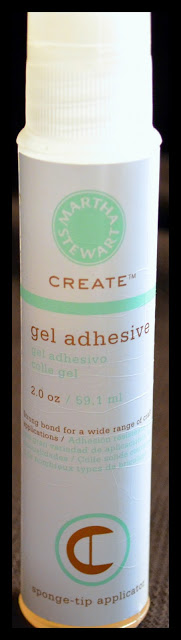
This is the glue we used BUT I have to tell you…Any glue would work, even a kids glue stick!
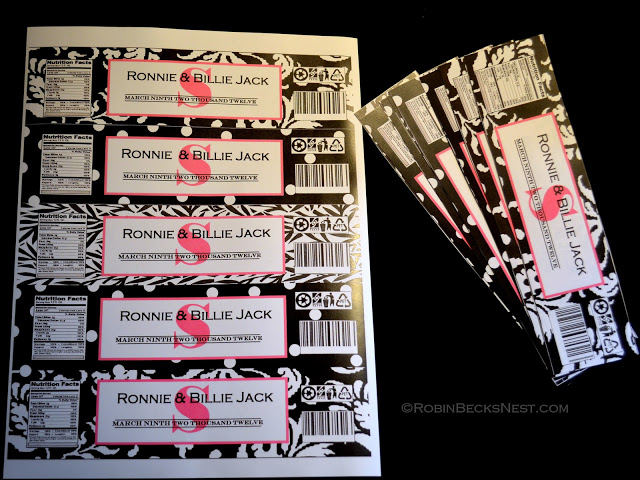
Once you get the template (shared below) to say what you want on it, print out one copy. Take that copy to THE UPS STORE and have them run as many as you want on their color copy machine. The reason I suggest The UPS Store is because their regular paper is really nice and has a shine to it. I had them darken the shade up by two notches and was really happy how they turned out! Color copies were on sale for 25 cents the day I went in. There are 5 labels per sheet.
***************************
So lets talk templates. First off, I thought making water bottle labels might have been “my” idea, then I Goggled it. Nope, not my idea at all! I was thrilled though that others had gone before me AND posted their templates online. The one I liked best worked right on Word, I didn’t need Photoshop.
Thanks to Lindsey Hamlin for the perfect template, click HERE to go to it. A box will pop up, click OPEN or SAVE AS and give it a minute or two to download.
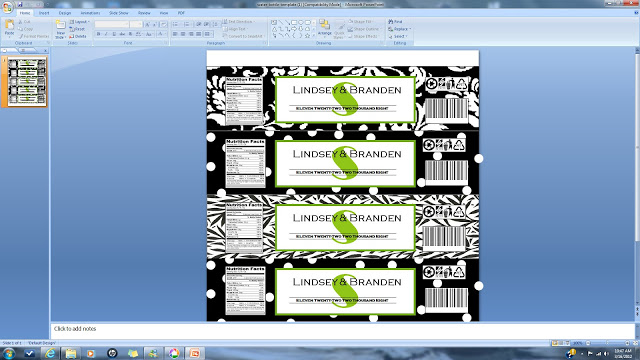
When you open it it will look like this:
Note: clicking on the photo above won’t take you to the template download you have to click HERE to get it.
Now this is where you make it your own. Click on the S to change it to the initial you want, go to colors to change the color of it. Click on the names to change it to your own, ditto with the date. You can even change the font. Just start clicking and experimenting. The green rectangle box around the name and date, click on it then go straight up to “Shape Outline” and change the color. The background doesn’t even have to stay black and white, see example below…
Click on the background of each label then go straight up to “shape fill” and change the color.
Have fun, play with it but make sure you SAVE your work!
We arranged our water bottles on a table. If you were to put them in a bucket of ice the ink would wear off and the paper would be a mess UNLESS you covered them with clear shipping/packaging tape. The best way to do this is to cover each label with the tape BEFORE you put them on the bottle-You won’t have to use any glue. Just make sure you cut the tape longer then the label itself. Don’t rush the tape process if you don’t want creases.
The water bottles were a big hit at the wedding reception, everybody wanted one when they realized what they were all about.
These inexpensive water bottle labels would be great for a baby shower, bridal shower, birthday or any fun event.