Teaching a child to ride without stabilizers
Contents
I learned how to ride a bike the traditional way. My father ran next to me until I got going. After letting me go, I panicked and ran into a bush. I then refused to learn until my sister (who is three years younger than me) learned before me.
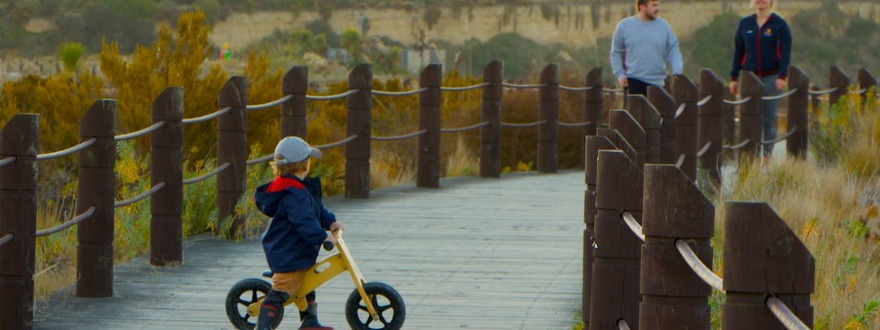
When my children got old enough (and interested) in learning to ride a bike, I knew I had to do something different. For one, I wanted them to have a better experience than I did. For another, I am now an adult and terribly lazy. Running next to a bike for hours didn’t feel like how I wanted to spend my afternoon.
My three oldest kids all learned how to ride use the following 4 easy on your back steps.
Just so you know. I am not teaching the fastest way to learn to ride a bike. I’m showing you a pain free way for both you and your child. Gentle even. Although there are no guarantees, your child could still ride into a bush. But hopefully not.
So, How Long Will This Take?
It’s going to depend on how old your child is and how confident they are. Grace was 7 when she learned, but so paranoid, so it took her about 3 months. Ben learned in just a few weeks (at age 5). We taught Ben and Grace at around the same time. Then two years later we taught Faith (also 5). She learned in just a few days (once we got her the right size bike).
Remember, this is with me and Hubby doing pretty much nothing, aside from teaching each step and encouraging.
Step One: Buy the Right Bicycle for Learning
I have three options for you depending on your income and how much effort you want to put into it. This post contains affiliate links, thank you for supporting the work of this blog.
Option 1: Buy a Balance Bike
A balance bike is basically a bike without pedals. It helps a child focus only on the balance part of bike riding. They are somewhat expensive and aren’t going to be used for very long (unless you start them really young). But if you have (or are planning to have) multiple children it could be worth the money and save you some time.
Auto Amazon Links: No products found.
Option 2: Use a Normal Bike
Except you’re not going to use it like a bike but like a balance bike by taking the pedals off. The benefit of this is that later, you won’t have to buy another bike but put the pedals back on this one.
The problem is that taking the pedals off leaves the stems where they attach and my children have complained about them scratching.
Faith wouldn’t keep learning on her bike with the pedals off for this reason.
Option 3: Use a Cheap Bike
Not just a normal bike, but a really cheap bike. Look on craigslist or thrift stores and find a bike whose tires are good. We got ours at a thrift store for $10.
The state of the chain doesn’t matter because you’re going to take it off!
The whole thing. The chain, the pedals, the thing the pedals screw to. All of it. Here’s what you are left with.
So much cheaper than a balance bike and just as useful
A note about size
When your child sits on the bike their feet should not be flat on the ground. It will still work, but it will be hard for your child to follow the next step if their feet are flat.
Step 2: Learn How to Coast
Coasting is staying balanced with your feet off the ground (no pedals remember) while the bike is moving.
This teaches the child how to balance on the bike without worrying about pedaling.
I showed them how to coast while I was on my bike. I did a lot of repeating the same phrases over and over.
“First I push off with one foot until I am going fast then, lift my foot, and coast. Before I run out of movement, I push off with my foot again. I always look up so I know where I’m going.”
It doesn’t matter if they use the same foot or different ones. When I first showed my children how to coast, they all coasted like they were walking, left foot then right foot.
When they can go down a slight slope without touching the ground and without looking at their feet, they are ready for step 3.
How to move things along
This step can take a long time depending on how comfortable your child is with risk. To move things along, they need coasting to be comfortable which means lots of practice.
To get concentrated practice you could:
- Go on a coasting bike ride. Both of you coast a few blocks or until they are not interested in practicing anymore.
- Find a slightly sloped area to practice (then they don’t have to worry about the pushing off, just the balance.
- Once a slight slope looks comfortable find a steeper slope.
What This Step Looked Like for Us
I am lazy and not in a big hurry for them to learn how to ride bikes. So, after I taught them how to coast, I stepped out of the picture. They practiced on their own and in Faith’s case, with siblings.
We had the perfect driveway for this at our old house. It started in a slope and then a nice long straight path and then right into the garage door, which the kids thought was hilarious.
Every once in a while I would ask a kid how their coasting was going and if they would like to show me. I would then offer encouragement or let them know they were ready for the next step.
Step 3: Learn to Push Off
It’s time to put the pedals back on. I found it less stressful to teach pushing off and then teach pedaling but some kids won’t need this step.
Here’s how I taught pushing off. You start with one foot on the pedal and get your bike so the pedal is all the way down. With your other foot, you push off the ground three times and then coast.
It’s a lot like riding a scooter (which my older two kids had a lot of experience with).
Again, I demonstrated how to do this for my kids then let them practice without me.
You want the place they are practicing to be as flat as possible. A slope will make things too easy and a hill (or even a slight uphill slant) will make things too hard.
You know they are ready for the next step when they can push off three times without looking wobbly and without looking down.
Step 4: Learn to Pedal
This step that used to be the hardest part is now going to be so easy.
Start just like in step 3. I demonstrate and talk while showing what to do.
“One foot on a pedal all the way down and push off from the ground three times. But now your going to lift your other foot up and instead of coasting, your going to put it on the pedal and push.”
It only takes a few tries before they make a complete circle with the pedal and then several rotations and then suddenly they’re going down the street with mom behind them saying, “Keep going, keep going!” and high fives afterwards.
Following these four steps, a motivated learner could probably learn in a day. Or you can follow the laid back, check in every once in a while way that I do. Either way the learning is painless and so is the teaching.
No back breaking runs!
What If My Kid Is Really Struggling?
All of my 3 kids begged to try pedaling before they had really figured out coasting. And I let them.
They failed.
They weren’t ready. It was frustrating and scary. After that, they were able to focus on coasting knowing they needed that skill to feel safe on a bike.
If your child is struggling, go back a step and make sure that step was truly mastered. It’s going to feel like failure to them and it might be hard to convince them that it’s not. But it’s crucial that each step is mastered before you move on if you want bike riding to be pleasant and not scary.
How Young Can You Start?
You can start as soon as your child is tall enough to sit on a bike without pedals. If that’s a strider bike, that means about 18 months and up. We are waiting until our 2 year old is tall enough to sit on the 12 in. bike we already have.
Auto Amazon Links: No products found.